
Reasons to have a hobby
Happy New Year Everyone and welcome to my first blog post. Six years ago I started card making and paper crafting and in the last six later I’m still get asked the same question each time. Where do I find the time to create my projects? After deep thought and reflection to this question I would have to say “You need to find time.” We all lead busy hectic lives. Whether it is being a mom who cooks, cleans, does laundry, helps kids with homework, works full time, and the list goes on, or being a student. We need to face the facts, we have a gazillion things to do with no time for ourselves and if we don’t make time for a hobby or for ourselves, we will reach burn out really quick.
So here are the five reasons for having a hobby.
 1. Stress Relief/Clearing of the Mind: We need to admit everyone leads a stressful life. Trying to juggle multiple hats at once has become the norm. I always attempt to put one day aside a week to make cards, or 3-D projects. Let me tell you it feels really good to start pressing (or pounding) the stamp into the stamp pad or on paper and envisioning myself pounding the stress away. After stamping a couple of images, all my worries are gone and I see the best things in life that have been hidden away due to the pressures that happened during that week. Seeing the better things not only clears my minds and allows me to see the good, but it allows me to step away for a brief moment and be able to come back to the stress with a clearer vision.
 2. Creativity Spark: Stamping allows me to exercise my brain. Just like our bodies need daily exercise in order to function properly, our brain needs the same amount of exercise. I find that each time I stamp it allows me to approach my daily stresses with a clearer and more open mind. I’m able to see my stress in a different perspective or allow me to envision a different solution.
 3. Spend time with my kids: Now that my kids are getting older (6, 3, and 2), I’m finding that paper crafting and rubber stamping is a good bonding experience with the kids. When my kids were smaller we spent a lot of time reading, playing together and going for long walks. Now we’ve added paper crafting to the mix. We spend time talking about what makes their teacher so special and create thank you cards or gifts for their teachers or talk about where we want our next birthday and make birthday invitations based on the theme. It is the best time for me to feel no pressure and spend good quality time with my kids.
 4. Socializing: Whether I’m teaching a class or getting together with fellow paper crafters, nothing feels better than getting a break from kids and the daily stresses. Talking with adults that have the same interests not only allows me to learn new techniques but it also allows me some me time with adults. Let’s face the facts, when you teach children all day and go home to deal with your own children after a while the anxiety level goes up. It feels like you are doing child talk and discipline 24 hours a day and what relief it is to be able to get together with adults and speak adult language.
 5. Learning a new skill: Let’s face facts I’m no art major or graphic designer, but being able to learn a skill is so rewarding. At the beginning it is baby steps, but as you keep practicing you begin to challenge yourself to learn more challenging techniques which makes it rewarding to see the growth in the hobby you have taken on.
Making time for a hobby has it positive effects on your life and family. It not only challenges you to learn a skill but it allows you to clear your mind, spend time with the kids, meet new people and socialize. So the next time you see someone that is creating and you know it is of interest to you ask them if you can join them or look for a nearby class. The more you participate in it the more you will get used to the routine of making time for yourself.







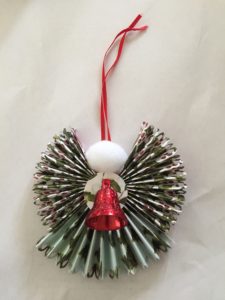 1. Angels: Remember when we used to fold paper and make paper fans. Well folding has now gone to another level. All it took is two sheets of paper folded into a fan and done. I added a pom pom and a bell to it to make it look more of an angel.
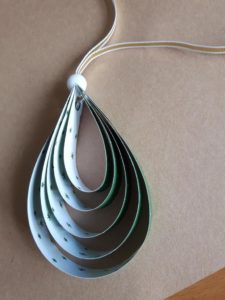
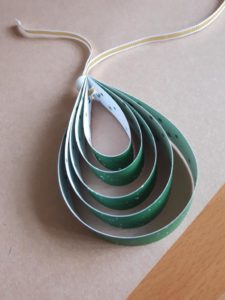 2. Sometimes a few strips of
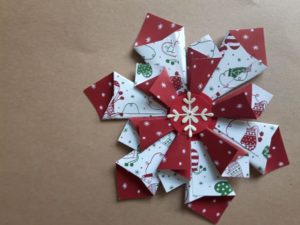 3. Why not make a mini wreath for your tree using (yes)
 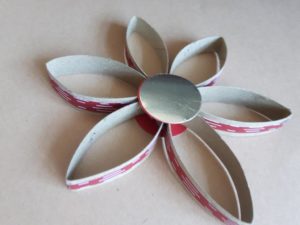 4. Now don`t be surprised….Yes, paper towel rolls cut into strips and designer series paper to turn it into a beautiful flower for a tree. And to add a glitter factor or shine, just add



 1. Stress Relief/Clearing of the Mind: We need to admit everyone leads a stressful life. Trying to juggle multiple hats at once has become the norm. I always attempt to put one day aside a week to make cards, or 3-D projects. Let me tell you it feels really good to start pressing (or pounding) the stamp into the stamp pad or on paper and envisioning myself pounding the stress away. After stamping a couple of images, all my worries are gone and I see the best things in life that have been hidden away due to the pressures that happened during that week. Seeing the better things not only clears my minds and allows me to see the good, but it allows me to step away for a brief moment and be able to come back to the stress with a clearer vision.
 2. Creativity Spark: Stamping allows me to exercise my brain. Just like our bodies need daily exercise in order to function properly, our brain needs the same amount of exercise. I find that each time I stamp it allows me to approach my daily stresses with a clearer and more open mind. I’m able to see my stress in a different perspective or allow me to envision a different solution.
 3. Spend time with my kids: Now that my kids are getting older (6, 3, and 2), I’m finding that paper crafting and rubber stamping is a good bonding experience with the kids. When my kids were smaller we spent a lot of time reading, playing together and going for long walks. Now we’ve added paper crafting to the mix. We spend time talking about what makes their teacher so special and create thank you cards or gifts for their teachers or talk about where we want our next birthday and make birthday invitations based on the theme. It is the best time for me to feel no pressure and spend good quality time with my kids.
 4. Socializing: Whether I’m teaching a class or getting together with fellow paper crafters, nothing feels better than getting a break from kids and the daily stresses. Talking with adults that have the same interests not only allows me to learn new techniques but it also allows me some me time with adults. Let’s face the facts, when you teach children all day and go home to deal with your own children after a while the anxiety level goes up. It feels like you are doing child talk and discipline 24 hours a day and what relief it is to be able to get together with adults and speak adult language.
 5. Learning a new skill: Let’s face facts I’m no art major or graphic designer, but being able to learn a skill is so rewarding. At the beginning it is baby steps, but as you keep practicing you begin to challenge yourself to learn more challenging techniques which makes it rewarding to see the growth in the hobby you have taken on.